

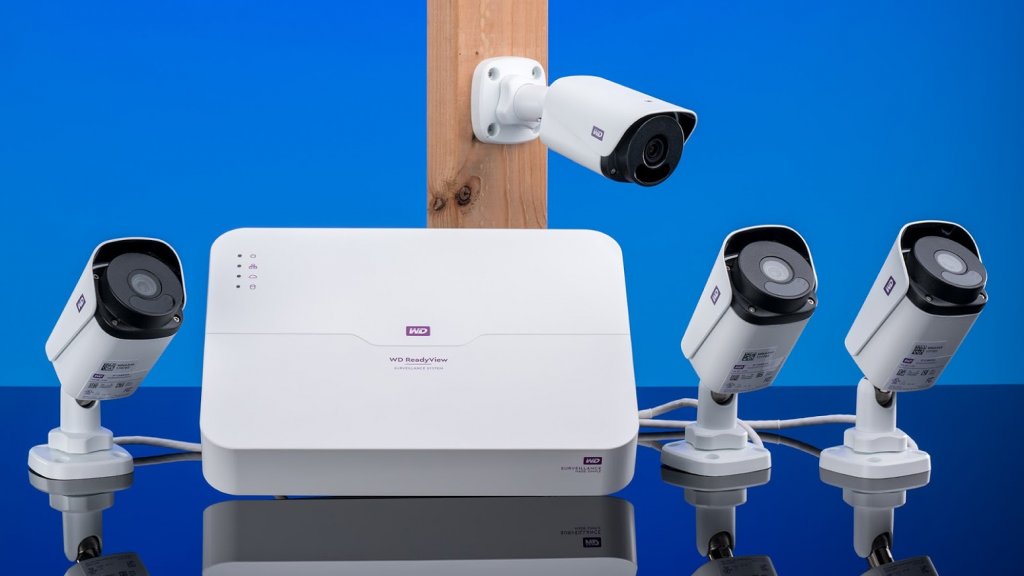
Recently Western Digital gave us a chance to try out the ReadyView surveillance system, an all-in-one, four-camera system that comes complete with a WD Purple surveillance drive. Without getting into the nitty gritty just yet (don’t worry, we’ll do that later), this was a really fun product to test for ourselves.
“Sure,” you may be thinking, “but it’s a surveillance system, how fun could it be?” Well, to answer your question, the fun was in the setup. I’ve set up several surveillance systems in the past. My rookie years in tech were spent at a mom-and-pop tech shop in suburban Ohio, and you’d be surprised at how many suburban mid-westerners want to put a tight lock and key on their homes with some high-tech surveillance. That being said, I’ve been around the block. And setting up a surveillance system is, at best, a complicated beast to solve. At worst, it’s a complicated nightmare to solve.
This was neither of those things. It was easy to set up, and did everything it was supposed to do, right from the start. What a breath of fresh air that was.
Disclaimer: This article was produced in partnership with Western Digital.
Setting up the ReadyView in the Newegg studio

We’ve been meaning to test-run a new surveillance system for some time here in the Newegg Studio, and while we have to give the ReadyView back to WD after we’re done, it definitely made a good first impression on me.
When I tell you the ReadyView was one of the easiest pieces of technology I’ve ever tried to configure in my six-year career, I’m not exaggerating. The entire process took me about five minutes, and all the time I spent afterward was just diving into the higher configuration options like data backup and motion detection, which we’ll get into later. As for just hooking up the cameras and monitoring the live feed? Yeah, about five minutes.
To start, I unpacked everything and installed the ReadyView app. You’re able to plug your system into a monitor of some kind for watching your feed, but the app is really the draw. It’s clean and very easy to navigate, especially when compared to the monitor-viewed version. We decided we only needed two cameras to really get a feel for how this would work, so we set one up in one corner of the studio, and one in another.

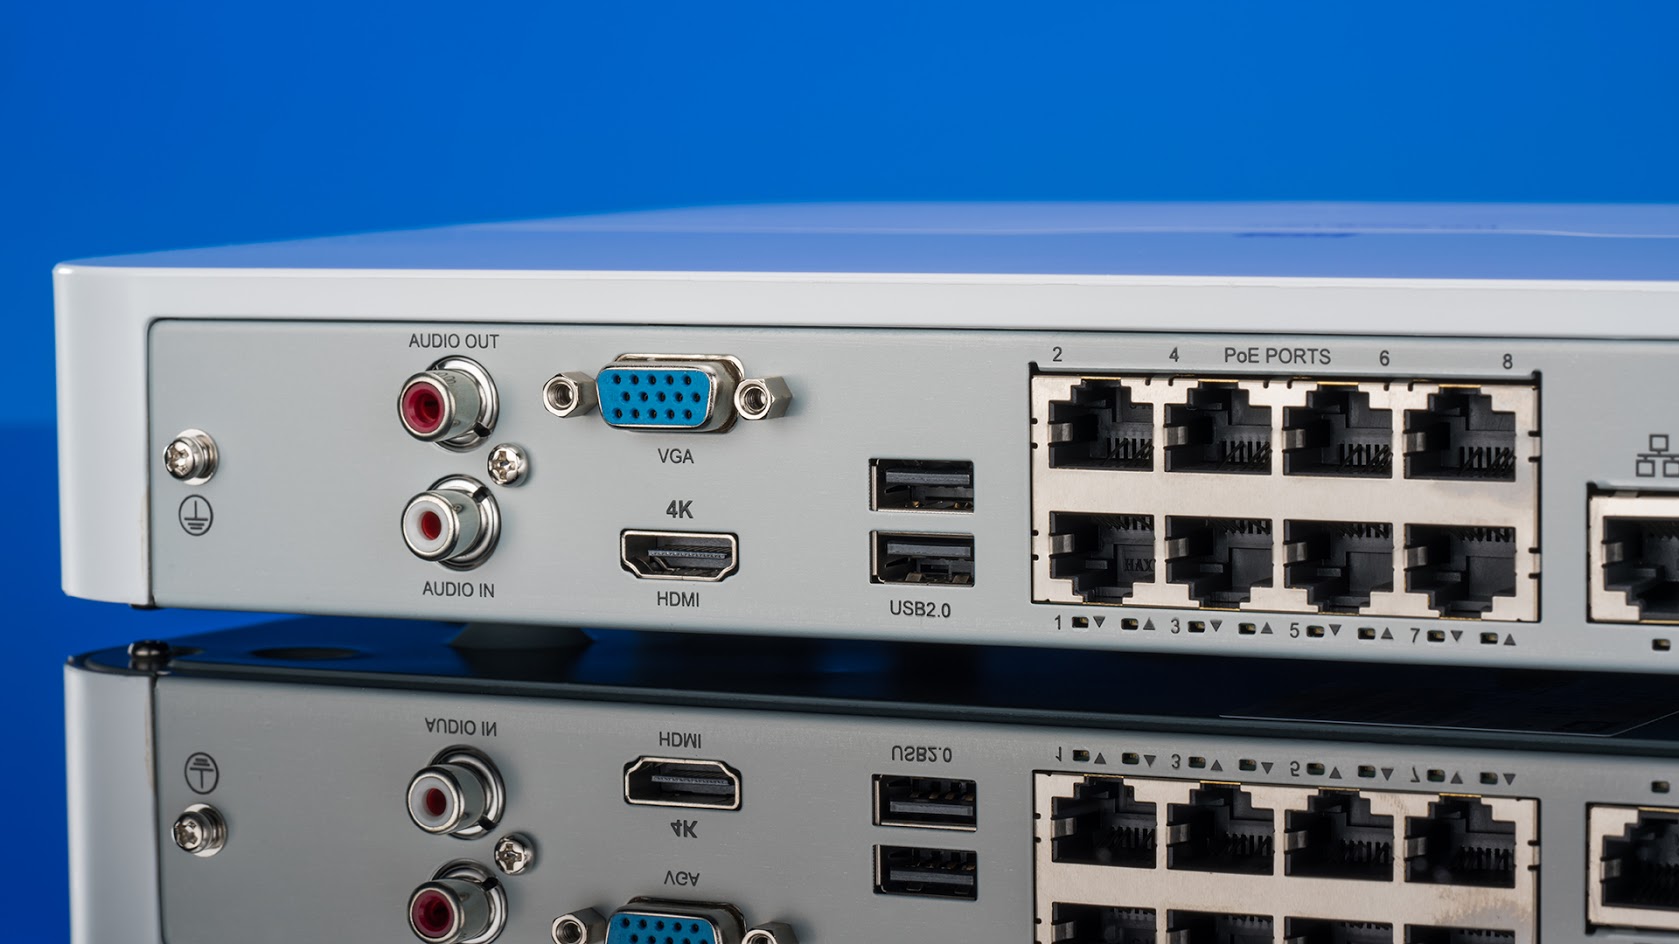
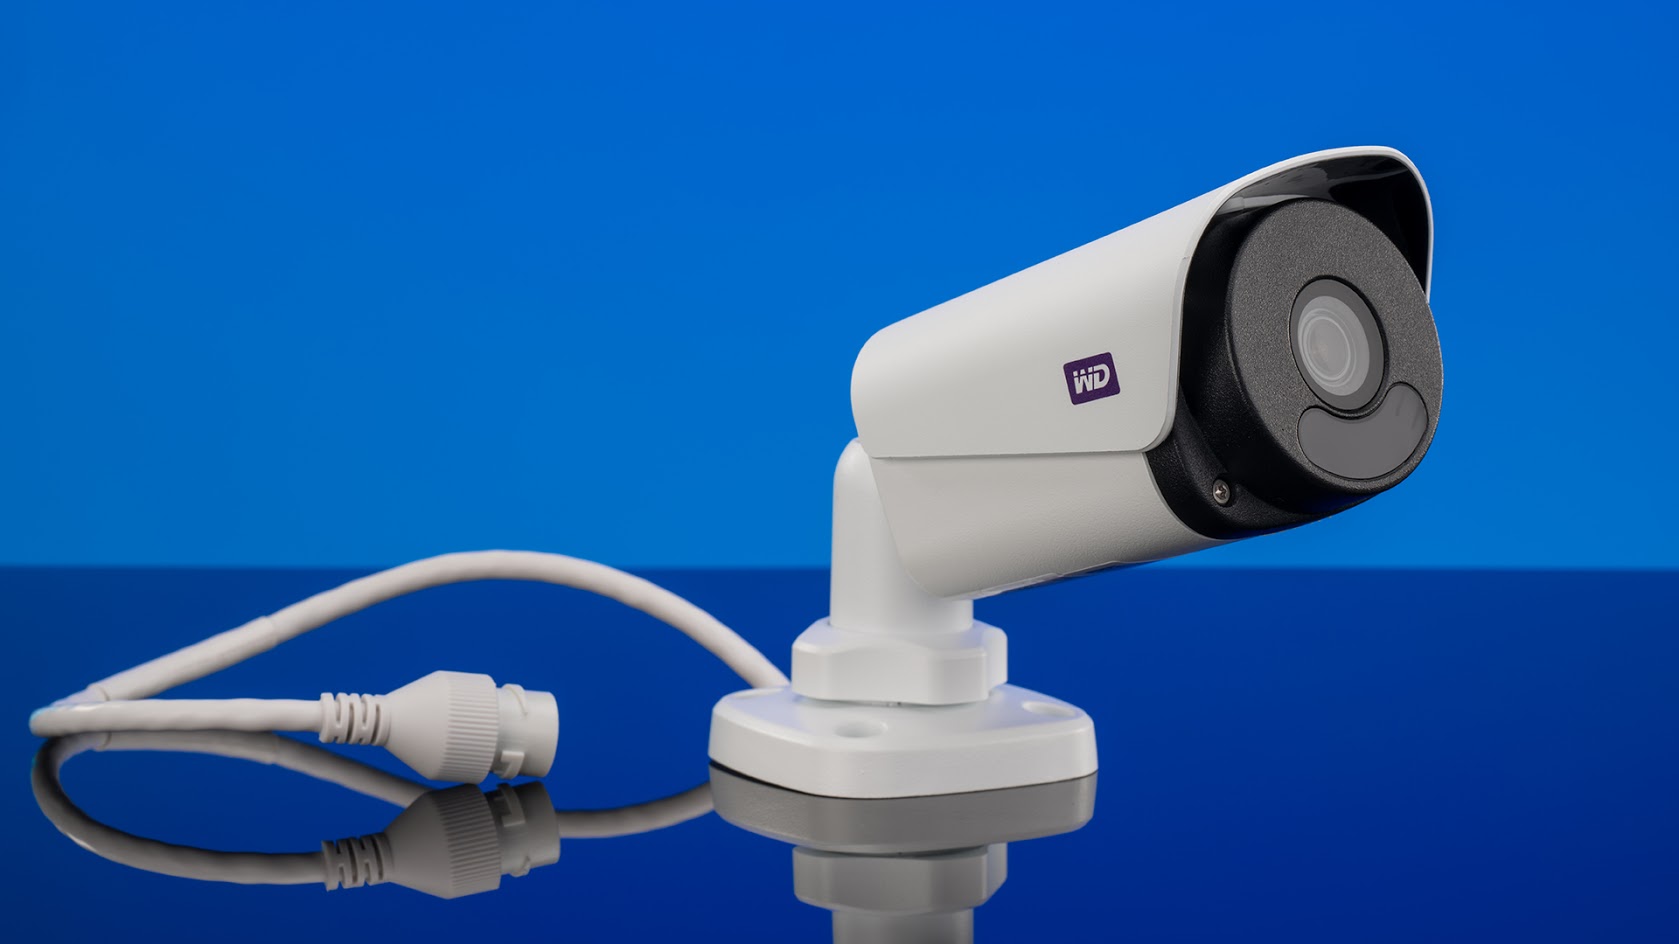
These cameras are not wireless, which means you’ll have to run ethernet cables (which both power and connect the cameras to the feed) throughout your house, business, or wherever else you’re setting this surveillance system up. The included cables are long (100 ft. each), but you may want to consider getting some longer ones if your coverage area is larger.
After everything was unboxed and the app was installed, the setup process began. I ran the cables to where the cameras were mounted, plugged the unit into my LAN switch, and plugged in the power cable. Then I opened the app and scanned the QR code on the back to pair the app with my surveillance system specifically. A few minutes later, the camera feeds showed up in the app. That’s it: Unbox, plug in the cables, scan the QR code.
Live broadcast and recording

After the five-minute setup process, we dove into the ReadyView’s meat and potatoes—its live feed and video recording features.
The live feed was pretty straightforward. Open the app on your phone, and it shows you the live broadcast from all of your plugged in cameras. The interface was nifty, too, as it allowed you to easily swap between a splayed out view of all your cameras or a close-up of just one. With only a couple minor exceptions, the process was very intuitive, and it was easy to figure out without needing to look anything up.
By default, the live broadcast spits out the feed using SD quality, but you have the option of switching to HD and ECO. HD is self-explanatory, and ECO is just a black-and-white feed that takes up less power and less storage space to record. We don’t really have a need for HD surveillance in the studio, so I let it run on standard.
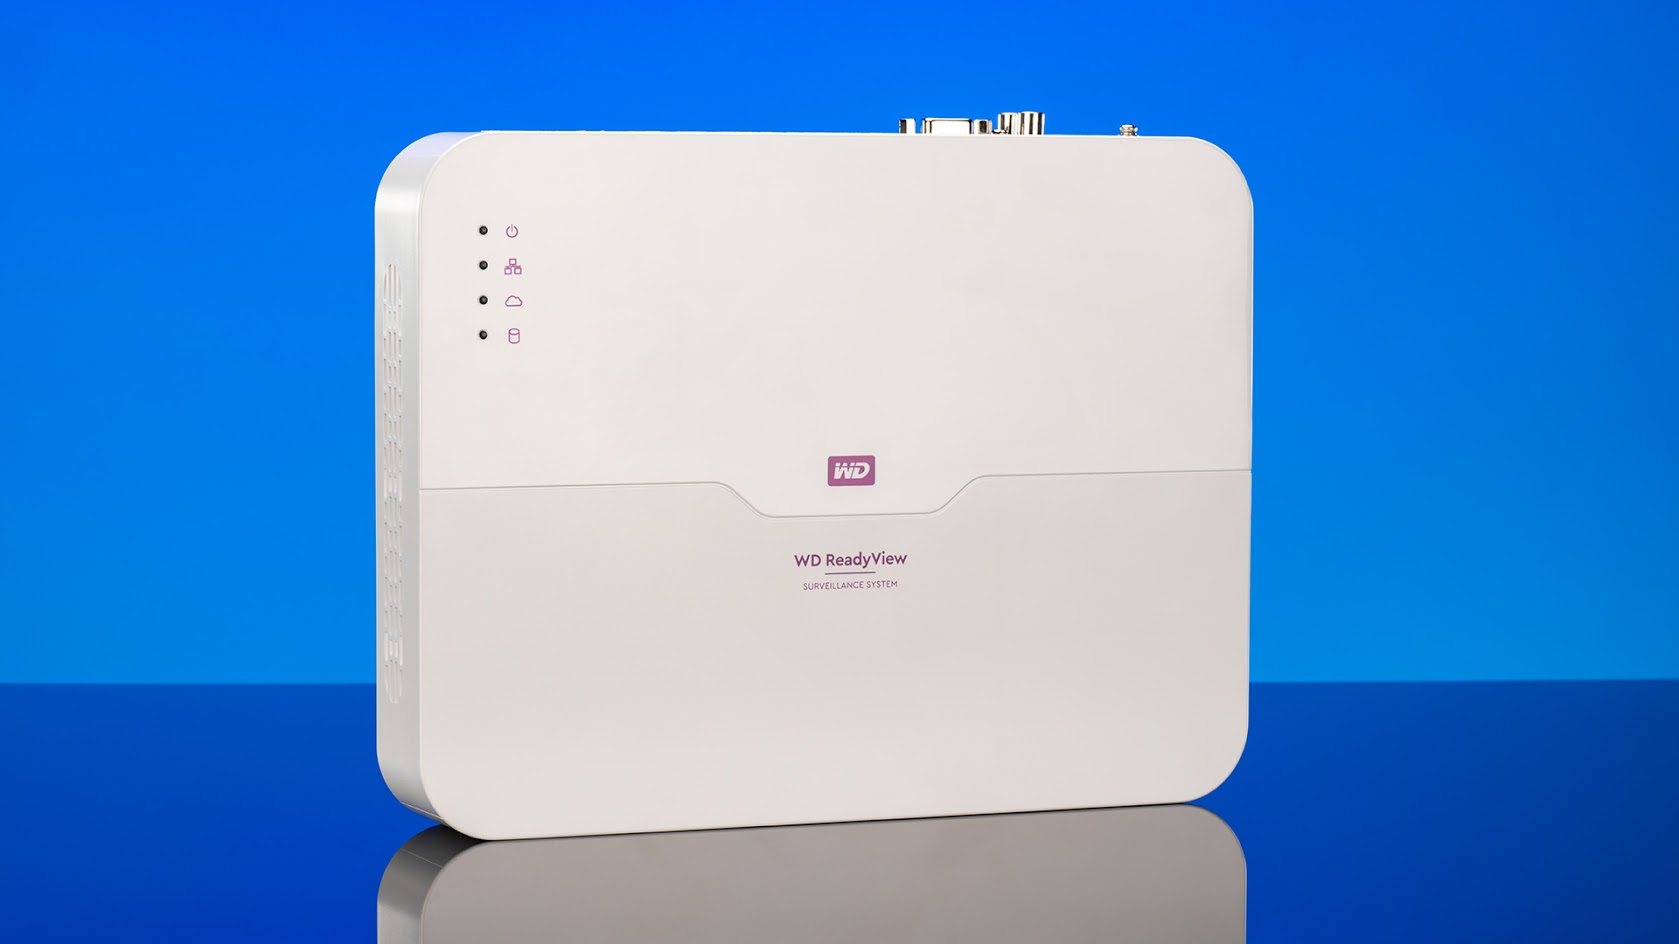
Recording is where things get a little more complicated. The unit itself has 4TB of storage available, but still, you probably won’t want to just let it record all your surveillance all the time. There’s a possibility you will, depending on your needs, but in most cases, that’s out of the question. That being said, there are really only two good options for recording footage. The first is manual—you go to your feed and just tap the record button, and it starts recording. The second option, and probably the more useful one, is motion detection, in which you can set the feed to record itself whenever the cameras detect movement.
This is the coolest feature, mostly because you can change all of the nitty gritty settings from right there in the app, and it doesn’t take much time at all. You can set motion detection sensitivity, you can assign specific times of day for the motion detection feature to be on, and you can designate which cameras specifically you want to run it on. It’s a good feature, and probably the best that the system offers.
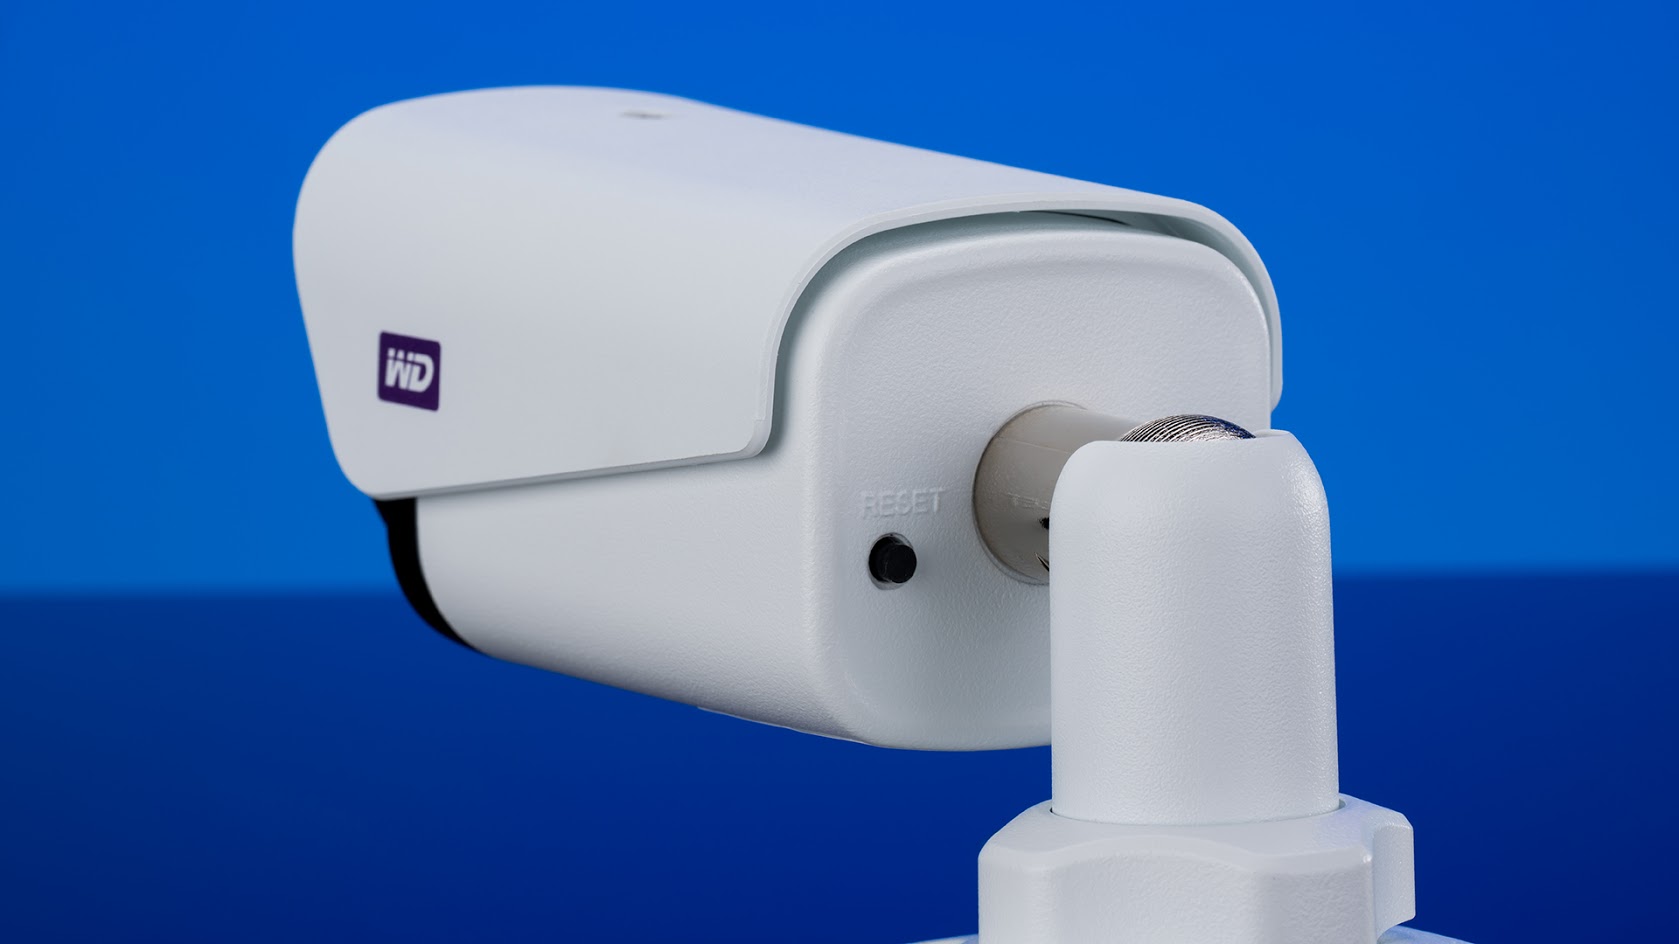
4MP and 2MP variant surveillance cameras
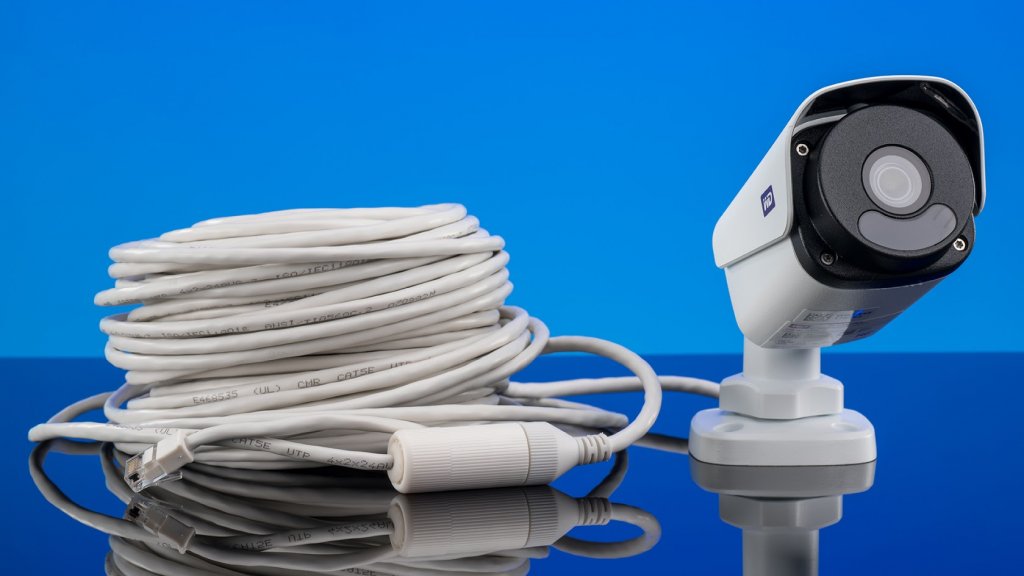
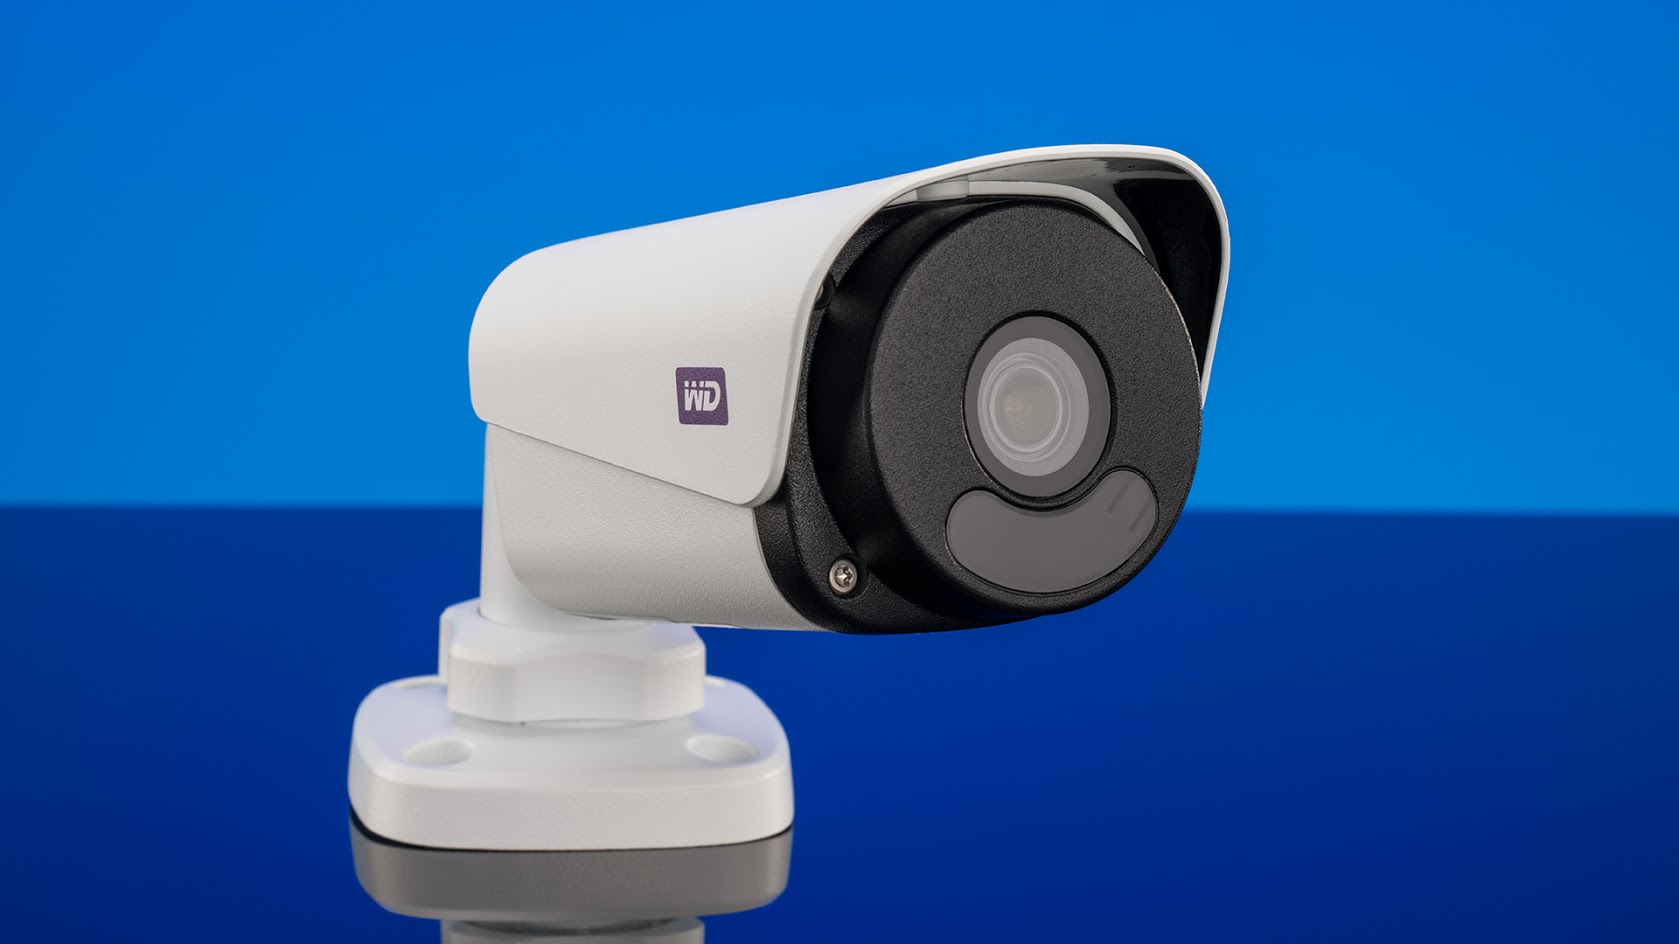
Just like the ReadyView system comes in 2TB and 4TB storage options, so too do the cameras come in variants. There are two different quality levels, being the 2 megapixel and 4 megapixel versions. While the 4MP is the more impressive and more expensive one, the 2MP is strong in its own right for those with a smaller budget. The 2MP cameras, for instance, record and broadcast in full 1080p resolution, and they feature commercial-grade water and dust resistance, as well as night vision. We got our hands on the 4MP variants in the studio, though, which essentially run at double the quality and resolution of the 2MP versions, while boasting the same weather resistance and dark-piercing night vision.
The price difference between the two cameras isn’t terribly extreme, at about $30 per camera, so you can upgrade if you so choose without breaking the bank. The quality of the actual footage held up both on mobile and on our monitor setup, which was particularly interesting to me, as I’m used to WiFi-transmitted footage suffering bit when compared to the physical connection. Fortunately, there was no sacrifice in quality even when I was just popping open the app on my phone.
Alerts and backup

The WD ReadyView’s primary features are its recording and live feed functionalities, no doubt, but there are some supplemental features included that really make the ReadyView what it is. Those two features are its built-in alert and backup systems.
The backup system was one of the first things I looked for when setting it up. After all, it might come pre-loaded with a snazzy 4TB internal hard drive, but if your setup records every time it picks up motion on a cam, that footage is going to add up, even if it isn’t in HD. One of the most important parts of any surveillance system on the market is its compatibility with backing up data. Fortunately, the ReadyView does that well – but it’s not without hiccups.
When I attempted to access the backup page within the app, all it told me was to connect to a WD MyBook. I thought it would be simple enough, because, as someone unfamiliar with WD’s products outside of lots hard drives, I assumed it was just some sort of online backup program through WD. It turns out it’s actually a physical external drive that WD sells specifically tailored to backing up data. A WD MyBook is what the app recommends in order to back up your data, but you can really use any external drive you have on hand. It would be nice if the app made this explicitly clear.
After I plugged in my regular old external solid state, everything went smoothly. The backup screen in the app changed to a backup interface, which allowed me to select which days of footage I wanted to backup, and when I plugged in a monitor to the surveillance unit, it added a couple of more features, too. One of the more helpful features there was the ability to trim clips from specific time windows.


The second important feature here is the alert system, which is one of my favorites to talk about. Push notifications often have negative connotations in today’s day and age. At the very least, most people are aware that they’re an annoying part of the smartphone era. On this, though, it’s a necessity. Why? Every time a motion detector trips, the ReadyView’s alert system pings your smartphone with a push notification. Annoying on other apps, maybe, but with ReadyView it could be the difference between catching a thief or not.
If you’re in the market for a new surveillance system, and as long as you’re comfortable with a wired setup, this one’s hard to beat. You can snag the 4MP/4TB version on Newegg for $499.99 and the 2MP/2TB version for $100 less, all starting on Aug. 30 when the product goes live. Extra cameras are available, too. There’s a 4MP camera for $99.99 and a 2MP option for $69.99.